

The Cannabis Auto Curing system is the easiest way to cure flowers after drying. Curing cannabis is an essential step for any flower that will be smoked (curing is not necessary for cannabis that will be extracted into bubble hash or pressed into rosin as the trichomes are separated from the plant matter). During curing plant biomass breaks down, making it less harsh when combusting.
There are hundreds of chemical reactions that occur during the curing process. Subjectively most will notice that after drying the majority of the smell will be gone from the fresh cannabis. A few weeks of curing will almost magically bring the smell back, usually with a sweeter undertone than the fresh cannabis had.
The traditional method of curing cannabis is the one I outline in the Dry/Cure section of the grow guide. It requires opening mason jars daily for 3-4 weeks to release gasses created during the biomass breakdown process. Not off-gassing the jars will result in a lower quality product and I’ve noticed will cause the flower to go yellow more quickly.
Opening mason jars daily sucks… especially with large harvests. This is where the cannabis auto cure system comes in.
Note: This tek is based on Derek Gilman Quest Green video on Cannabis Auto Curing.
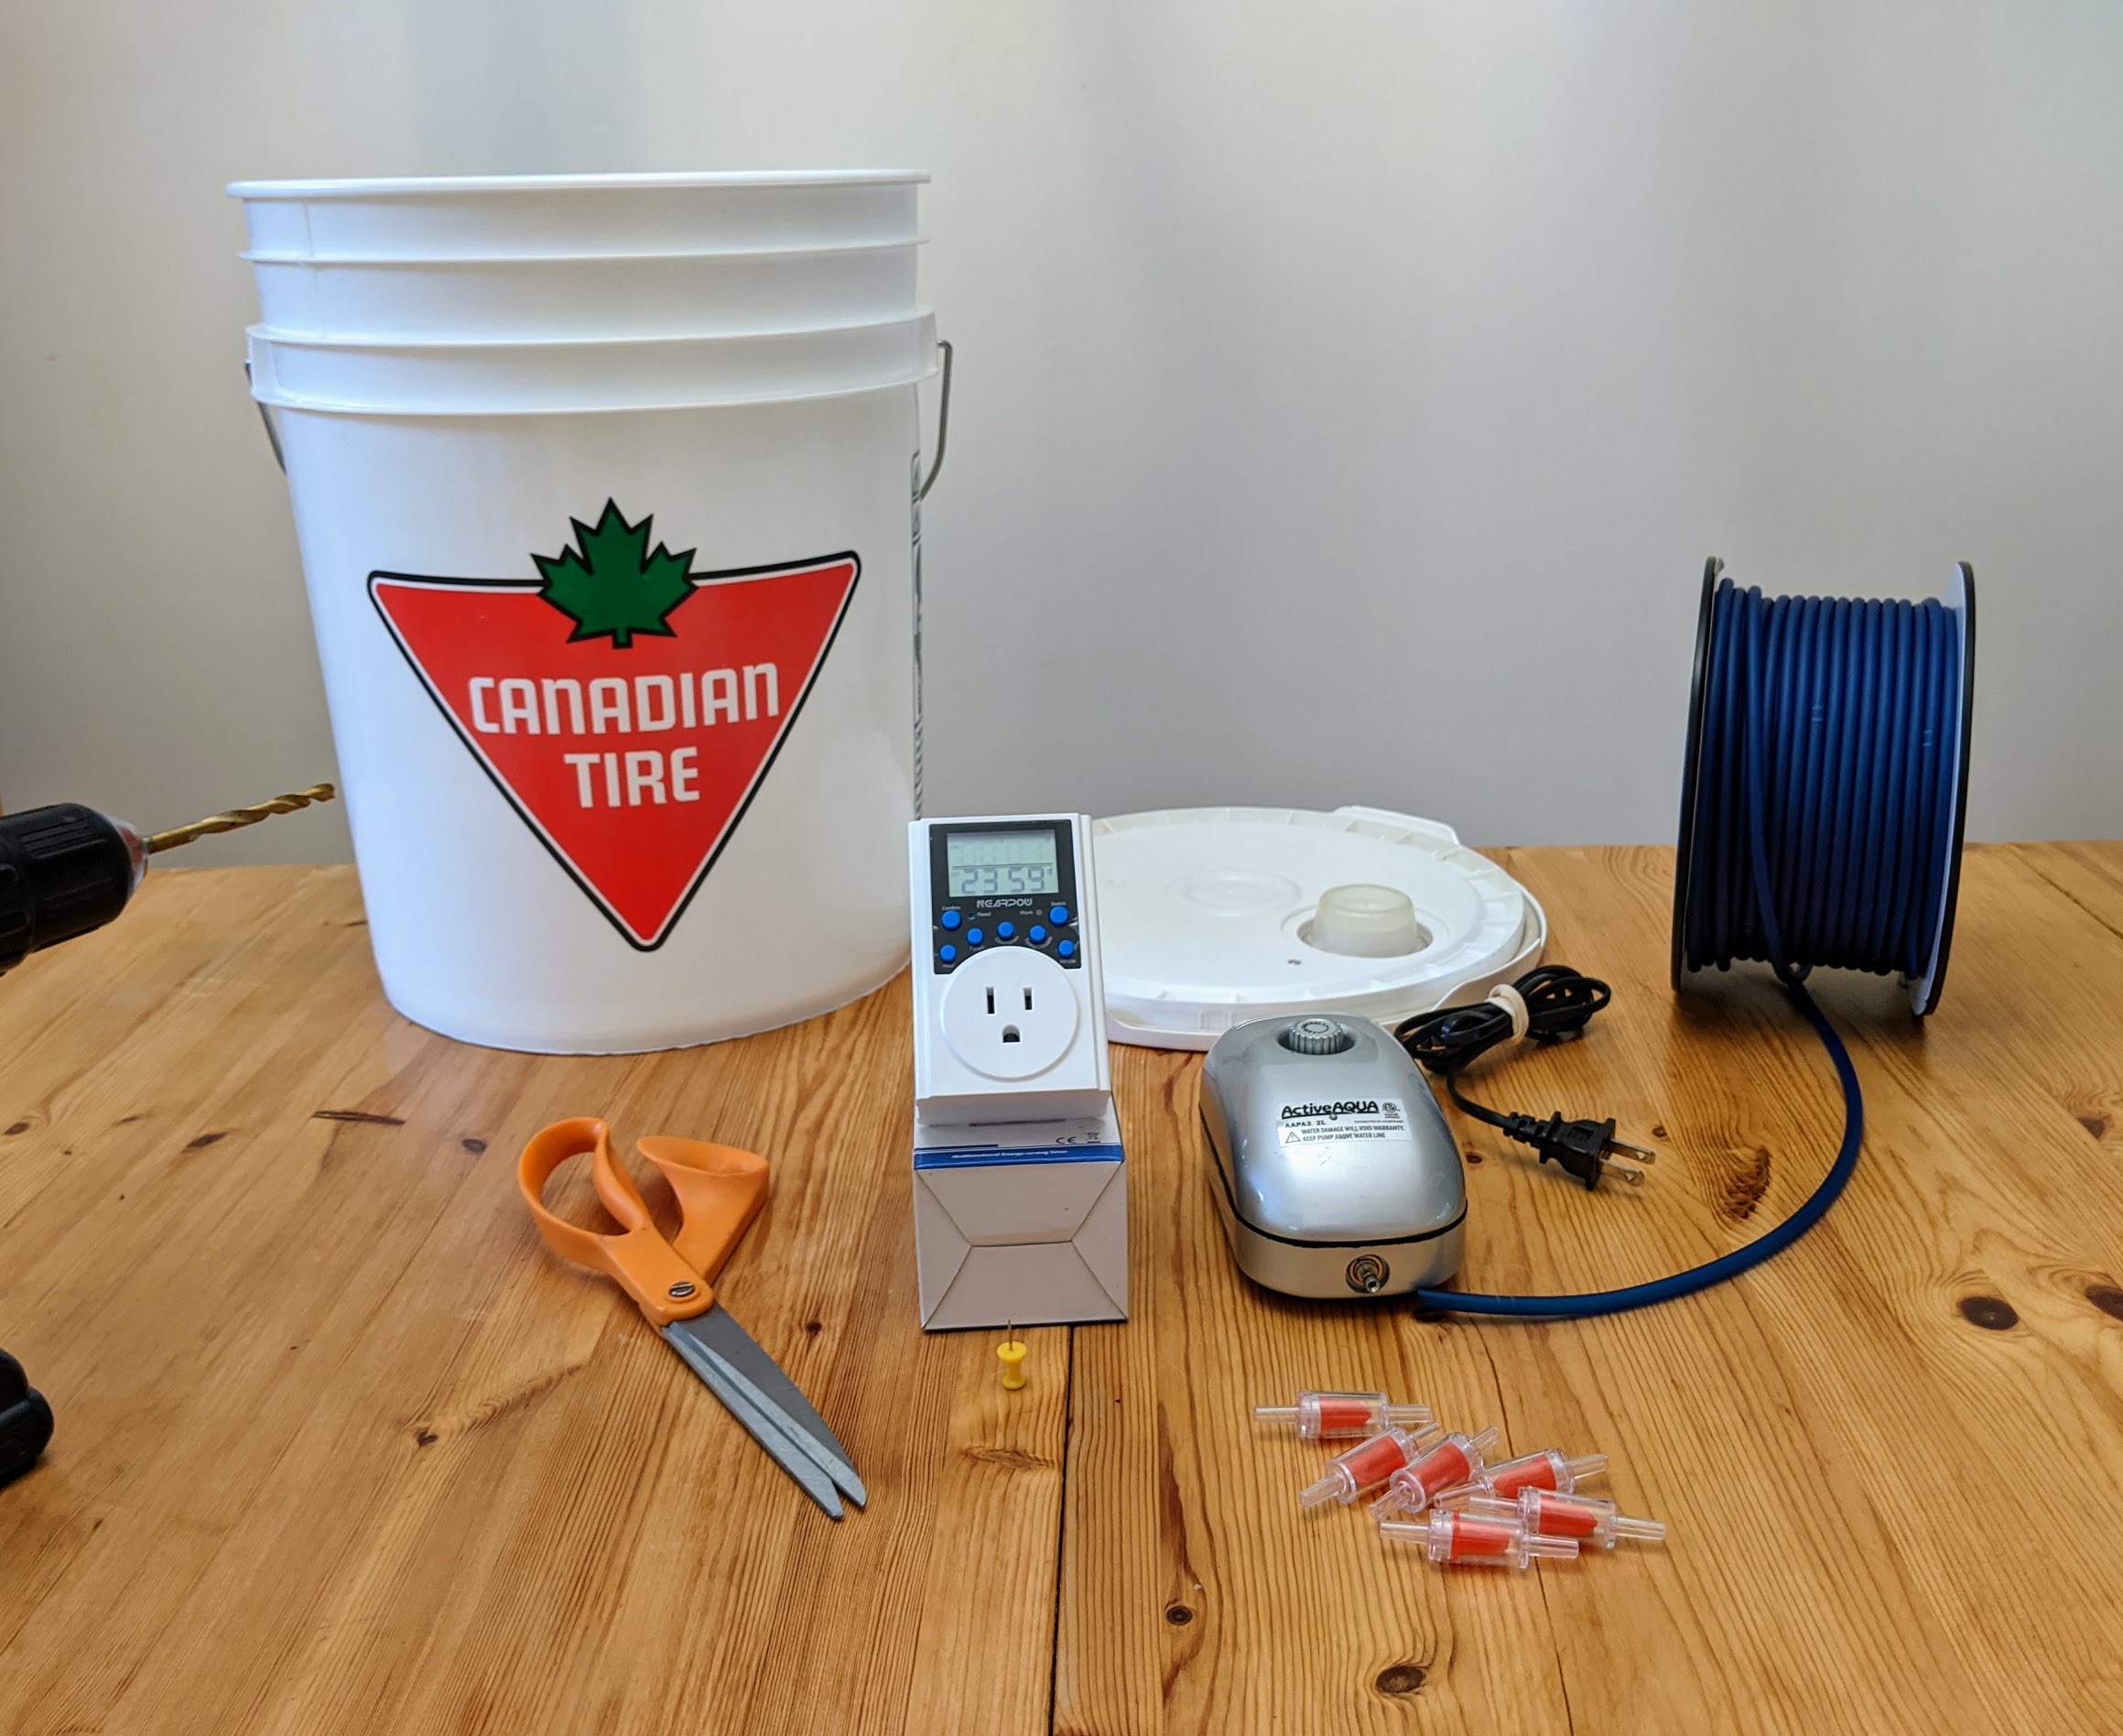
Materials Required:
- Digital Cycle Timer (same timer used for the DIY Aeroponics Cloner)
- Humidity Controller
- Airpump
- Check Valves (2x per bucket)
- Silicone Airline (avoid plastic, terpenes are very aggressive solvents that can react with clear plastic airline)
- Food Grade 5-gallon Bucket w/ Gamma Lid
- OR 5-Gallon Bucket + Gamma Lid bought separately
- Optional: Humidity Monitor (to install on lid)
Tools:
- 1/4″ drill bit & drill
- Needle or pin to pierce airline
- Scissors
- Hot Glue Gun
This build is extremely simple. The main thing I do differently from Derek is drill the two holes at the top of the bucket instead of drilling an inlet hole at the bottom. This keeps you from having to ruin a food grade bucket should you want to repurpose it for something else after. I run a slightly longer piece of inlet line and do not pierce the first 12″.
Step 1: Drill 2x 1/4″ holes 1″ down from the lip of the bucket.

Step 2: Install two air check valves in opposing configuration. One for air in and one for air out. You can blow into them to see which is which.

Step 3: Attach a 2′ length of airline to the input check valve. Use a Sharpie to mark where the hose hits the bottom of the bucket.

Step 4: Pierce the airline between your mark and the knot you tie at the end. This will ensure air being pumped in is evenly distributed on the bottom of the bucket.


Step 5: Set digital cycle timer to run pump for 1 minute every 24 hours.

Step 5: Add Dried and Trimmed Cannabis

The final step is to add your dried cannabis. Pack it in loosely. You can fill the bucket but do not pack it down or overpack. You want air to be able to move through the bucket easily and minimize flower-to-flower contact.
Step 6 (Optional): Install Humidity Monitor on Lid

If you want more information from the curing system you can cut a hole in the lid and glue a humidity monitor on. This will give you a realtime humidity reading without needing to open the bucket. On my system I put a Govee Smart humidity monitor inside so that I could track trends.
How Long Should the Air Pump Run during Cannabis Auto Curing?
I did a few timed tests where I attached an airline to the outlet check valve. I submerged the air-out line in a cup of water so that I could see how long it took to pressurize the bucket. On average it was about 15-20 second to pressurize and 40 seconds of off-gassing. This is why I went with 1 minute on – 24 hours off on the cycle time. Any longer than a minute I feel would introduce an unnecessary amount of air, potentially over-drying the flowers.

As shown in the picture below I have my bucket curing system rigged up to a humidity controller. This is my favourite way to automate the system.

If ambient household humidity is below 60%:
- Run a humidifier in the drying room hooked up to a humidity controller during drying
- The plants don’t have to be dried fully outside of the buckets
- Once plants are 50-75% dry unplug the humidifier
- Place the flowers in buckets and use the air pump hooked up to the humidity controller (I use a target humidity of 62%) to pump in dry air to finish off the drying.
- After humidity has stabilized switch over to the cycle timer/air pump combo to burp the buckets once daily
If ambient household humidity is above 65%:
- Run a dehumidifier attached to the humidity controller in the drying room
- Plants should be dried fully before putting in buckets. See harvest guide for details.
- Run cycle timer/air pump combo to burp buckets once daily for 3-4 weeks.


